Basic Knowhow of Ring Die of Biomass Pellet Mill (Part 2)
Scoring
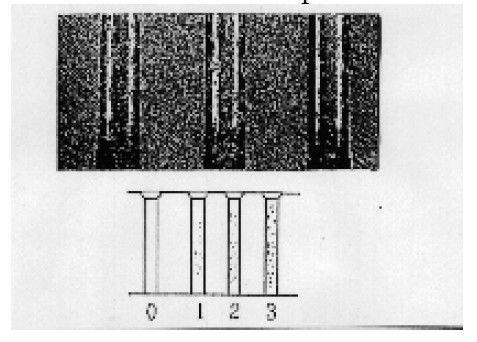
Scoring is the appearance of longitudinal lines down the hole wall. These marks are caused by severely abrasive pelletizing materials scratching the hole wall as they pass through. Very commonly, scoring will occur as the result of earlier pitting in the shape of a comet. The origin is the pitting and the tail is caused by scoring being passed through the pitted area. Severe scoring will slow die throughput and disrupt pellet quality.
The condition can be observed by removing feed from a hole and shining a light so that a hole is illuminated. When looking down the hole from the outside, a contrast can be caused on the hole walls so that early scoring will appear as little scratch marks in the sides of the hole wall. More severe scoring will appear as larger grooves. WARNING: Make sure that all the sediment has been removed from the sides of the holes with either a test tube cleaner or a pipe cleaner.
Clamping Surfaces
An important part of any die inspection is the inspection of the quill flange clamping surfaces.
These areas can commonly be cause of a broken die if the proper maintenance has not been performed on the adjacent wear parts, such as clamps and wear inserts. Thus, the overall goal of examining the clamping surfaces is to gauge damage to other parts of the machine. There are four surfaces that are inspected: the loose clamp surface, the clamp bottoming surface, the wear ring surface and the keyway.
Loose Clamp Surface
The loose clamp surface is the front of the die quill flange that mates against the clamping surfaces. This surface can suffer wear for various reasons. Items that can affect the wear include undersized quill flanges, worn pellet mill quills, worn die clamps, worn wear rings, and worn keyways. Finding the cause of the wear will necessitate gauging the rest of the surfaces.
A worn quill can cause wear on the loose clamp surface and the butt surface that mates against the quill directly opposite the loose clamp surface. Wear on both of these surfaces could indicate a quill rebuild is needed. Certainly the quill should be inspected carefully and the next opportunity.
Usual wear on the loose clamp surface is the result of worn die clamps. The clamps should be checked with the appropriate wear gauge provided for that die.
The condition can be observed by cleaning off any anti-seize material or rust from the surface.
Wear will appear as polished metal. A good item to determine is whether the surface was ground or hard turned during manufacture. By determining the type of finish, the wear can be gauged.
Clamp Bottoming Surface
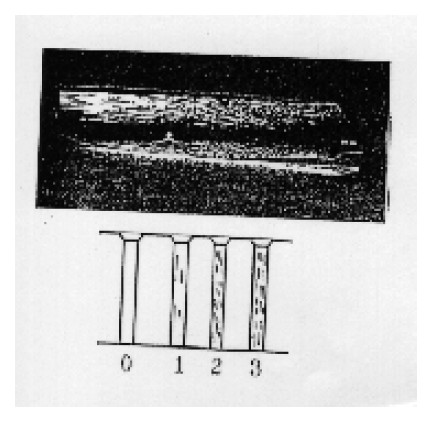
Clamp bottoming occurs when wear to the pellet mill die, quill, clamps, or any combination of the three becomes so severe that the inside of the clamp rubs against the top of the quill and the top of the die quill flange (the clamp bottoming surface).
The condition can be observed by cleaning off any anti-seize material or rust from the surface.
Wear will appear as polished metal. A good item to determine is whether the surface was ground or hard turned during manufacture. By determining the type of finish, the wear can be gauged.
Wear Ring Surface
The wear ring surface is commonly called the die pilot surface. This surface mates up against the wear ring insert in the quill. Again, the types of grinding and turning are similar to those previously mentioned, depending on the place of manufacture. Wear on this surface can be caused by installation with an already worn wear ring or an undersized pilot diameter.
Undersized pilots are an uncommon occurrence. Most wear on these surfaces is caused by installation of the new die with an old wear insert. Wear on this surface indicates that wear ring inserts should be changed immediately. Wear can also indicate that a die is loose and may often be the cause of wear on other surfaces within the mill.
The condition can be observed by cleaning off any anti-seize material or rust from the surface.
Wear will appear as polished metal.
Keyway
The keyway is the area recessed into the die pilot that fits the key and provides the drive for turning the die. This surface will tend to experience wear only if the die is loose or the key was undersize and worn to begin with at installation. The battering or “wallering” effect experienced by the keyway is caused by the loose key. As the key pivots in the keyway, it causes a doming effect on the sides of the keyway.
Common Problem Solving
Die throughput loss has several causes: conditioning, grind, die face rollover, and die hole condition (pitting and scoring).
Pellet quality losses are the other common complaint. Conditioning, grind, uneven die face wear, excessive honeycombing, die hole condition (pitting and scoring), relief pelletizing and insufficient effective thickness are all culprits of pellet quality loss.
Good Die and Roller Maintenance Procedures
Inspect dies carefully when they are on and off the mill, looking for key items.
1. Rollover and pitting/scoring - the most common cause for a slowdown in production.
2. Inspecting clamping surfaces for wear when removing old dies can prevent breakage.
3. Check the face wear pattern for indications of poor feed pad distribution.
4. Inspect your wipers and deflectors.
Roller maintenance is the key to getting maximum life out of your die.
1. Check your rollers routinely for unusual wear, chipping and/or sluffing.
2. Probably the most important factor in die life is the setting and adjusting of the rollers.
3. Roller lubrication is an important factor.
4. Depending on the amount and frequency of your die changes, always try to start new rollers with new dies.
5. Try to even out the wear on the roller shells by rotating them frequently.
What you need to know about rollers and how to adjust them.
Rollers
Two rollers are mounted inside of the pellet mill die cavity on eccentric shafts so their outer faces can be adjusted to contact the inner surface of the die. This is the most important adjustment on your biomass pellet mill. Correct adjustment will result in maximum capacity, minimum wear on both rollers and die, and eliminate undue stresses in the biomass pellet mill. When properly adjusted, the rollers will contact the die just enough to cause them to rotate.
Damage can be done by excessively tightening the rolls.
Link to know press rollers now
WARNING
1. Do not adjust rollers while die is turning.
2. Pellet mill start switch should be locked out before adjusting rollers.
3. Adjusting any machine while parts are in motion is extremely hazardous and failure to comply with this warning may result in injury.
Roller adjustment should be made whenever required. The die should not be run without feed any more than is absolutely necessary. Operating biomass pellet mill with rolls too tight will result in peening closed the entrances to the holes in the die and excessive wear of the die and rolls. See below for proper roller adjustment procedures. Instructions for changing die and roller assemblies are in the manual.
Different types of roller shell surfaces are available to meet varied conditions experienced in pelletizing different material. Before ordering other configurations, discuss with your Kingman Representative.
Get to know more about Pellet Mill now
Procedure
A. Clean off die and rollers.
B. Loosen adjusting screws ‘B’ away from adjusting gear.
C. To adjust roller closer to die, turn adjusting screws ‘A’ so they move the adjusting gear in the direction of the arrows. If this adjustment can not be made in the direction indicated, then the rollers have been incorrectly installed and must be properly reinstalled.
D. Properly adjusted rollers just clear the die surface.
E. If the end of the adjusting gear adjustment is reached, back off screw ‘A’ all the way, remove the adjusting gear, and reinstall it in the position shown above.
F. After adjusting roller position with screw ‘A’, lock adjusting gear in place by tightening screw ‘B’ against adjusting gear.
Comments
1. Rollers must be moved away from the die surface before changing dies. Use special roller wrench, if available, to rapidly rotate the rollers to their full back position.
2. Wear occurs on the surface of die and rollers as the pellets are produced. Check these surfaces periodically for wear and adjust rollers according to the above instructions when necessary.
Die Maintenance Tips
Loss of Production Rate
Die face rollover
Pellet chamber pitting/scoring
Pelletizing in reliefs
Rollers need adjustment
Loss of Pellet Quality
Die face rollover
Loss of effective thickness
Excessive honeycombing
Poor Die Face Wear
Badly worn rollers
Worn wipers and deflectors
Die face rollover
Roller Maintenance
Follow proper lubrication procedures
Proper roller adjustment, avoid hitting the die face
Look for unusual wear, especially chipping or sluffing
Start new dies with new rollers
Rotate rollers to evenly disperse wear
-------------------------------------------------------------------------------------------------------------------------------
News
- Small Pellet Machine Manufacturer-Kingman
- Application of Wood Pellets and Use of Biomass Pellets
- From Fossil Fuel into Biomass Pellet Fuel
- Biomass Pellet Making Machines Market
- Applying of pellet stoves for home use
- Highland pellets to build $130 million facility in arkansas
- How to deal with the blocked hammer mill
- How to Make Wood Pellets with Sawdust
- The government policy promotes the development of biomass fuel
- Market analysis of biomass pellet fuel
- Strategic positioning of renewable energy
- Biomass energy has pass through the pre assessment
- The key point of deep processing of biomass pellet
- Harbin is promoting the development of biomass machinery
- The development of biomass formation technology I
- The development of biomass formation technology II
- Biomass energy industry is now going full tilt in 2015
- Rapid increasing demand of sawdust pellet on the market
- Pellet fuel market in EU
- Chinese Biomass Energy Conference held in Beijing
- Future market development of straw pellet mill
- Peanut Shell Pellet Mill Makes High Quality Pellets
- The utilization of straw is only 5%, biomass energy needs our attention!
- Corn straw pellet machine relieves the tight supply of fuel energy
- Reasons for loose or not forming of biomass pellet mill


